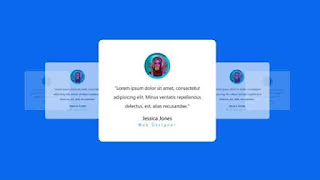
The customers want to get the most value for their money, so they look for happy owners of the product. This makes customer reviews important parts of any website. That's where the testimonials come into effect. In this article, we are going to share another important snippet on a testimonial carousel. If you want to collect the source code, I suggest you watch the tutorial below. You can understand the code better if you use this method. There are over a thousand videos on front-end development on our Youtube channel. If you want to learn more about front-end development, you can subscribe to our youtube channel.
I hope you've watched the above video and comprehended the basic concept. It's common to buy products or services online. People's testimonials help to build trust in your product and services. So you must have a well-designed testimonial slider if you’re going to get good leads and customers for your business. To create a carousel for our testimonials, we have used materialize CSS. Material Design is the basis of Materialize, a modern responsive front-end framework. This is a materialize CSS tutorial and it is a testimonial widget. To create this carousel testimonial slider, you must include the materialize CSS files in your project. You have to add the latest jQuery file so the carousel will work. We've modified the default Materialize CSS carousel and added a few additional features. We’ve taken five carousel items for the project. In each 'testi' div we have taken a div for the image, a paragraph tag for the comment, an h4 tag for the reviewer name, and an h5 tag for designation. Basic styling was applied to the project. You can easily comprehend them if you watch the video. The carousel snippets we used from the website are not automatic. To give the slider an autoplay animation, we've added custom jquery code.
You may also like:
3D Testimonial Carousel using Materialize CSS [ Source code ]:
To make this project, you have to create two files. One of them is HTML and, the other one is a CSS file. After creating the files, link the external CSS to the HTML file. Add the Materialize CSS and JQuery files as well. After that, copy the code from the below code box and paste it into your project. If you are facing any problems with the code below then download the code from the download button below.
ADD HTML:
ADD CSS:
I hope the source code was successfully implemented into your project. There are different topics of front-end development that we share source code. If you want to get the source code, visit our website regularly. Please share the articles on this website with other like-minded people so that they can benefit from them. Help others to learn as well and learn yourself as well. Helping each other is an important part of education. One share of yours can help someone find the one they are searching for. Thank you for vising our blog.


Post a Comment
Please Do not Enter any spam link in the comment box